Reinforced Club+6
In which you upgrade your main weapon to +6.
Lower Undead Burg
14. Lower Undead Burg: treasures & Blooming Purple Moss Clump, Dark Souls: Remastered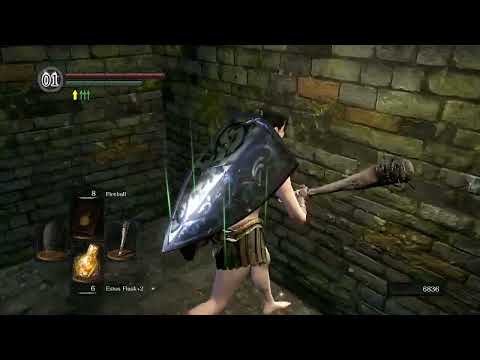
A shortcut connects Firelink Shrine and a route to the Capra Demon. For now, aim to open this shortcut and grab the following treasures:
- Twin Humanities
- Large Soul of a Lost Undead x 2
- Blooming Purple Moss Clump. Sold by the Undead Female Merchant. The moss will be useful to remove the toxic status effect inflicted by the Blowdart Snipers in Blighttown. The merchant also sells Purple Moss Clump (another useful consumable when you visit Blighttown) and Transient Curse (useful when you visit New Londo Ruins). Purchase at least 2 or 3 Blooming Purple Moss Clumps.
Northern Undead Asylum
5. North. Undead Asylum: Twinkling Titanitex4, Titanite Chunk, Red Titanite Chunkx2, Peculiar Doll
16. Location of Rusted Iron Ring, Dark Souls: Remastered
Revisit the Northern Undead Asylum to collect various items that will be useful later in the game. Use the elevator at Firelink Shrine to access a platform that allows you to roll off onto a buttress. Ascend the buttress and a spiral staircase to reach a crow nest. Curl up in the nest and the giant crow would take you back to the Northern Undead Asylum. Here is a list of useful items to collect:
- Rusted Iron Ring. The ring allows you to walk and sprint unencumbered in various bodies of water as well as the swamp of Lower Blighttown.
- Twinkling Titanite x 4. Obtained by trading Blood Red Moss Clump, Purple Moss Clump, and Blooming Purple Moss Clump with Snuggly.
- Titanite Chunk. Obtained by trading Rubbish with Snuggly.
- Red Titanite Chunk x 2. Guaranteed drop by Black Knight x 2.
- Peculiar Doll. Found in the cell where you originally spawned at the start of the game.
Lower Undead Burg
Defeat the Capra Demon to obtain the Key to the Depths. You require this key to access the Depths, where you can collect the Large Ember to ascend your weapons to +6.
Capra Demon
17. SL1 Capra Demon, Dark Souls: Remastered
The real boss of this fight are the Attack Dog x 2. Prioritize defeating these enemies as quickly as possible. Equip the Heater Shield in the left hand and the Reinforced Club+5 in the right hand. Upon entering the fog wall, block with the shield and sprint to the staircase. Ascend the stairs, then turn right and position your character at the top-right corner of the arena. Use the shield to block the attacks of the Capra Demon and wait for it to drop off the edge. Wait for the Attack Dogs to approach you and kill them one at a time. A one-handed R1 would likely result in your weapon bouncing off the wall. The fight against the Capra Demon is much easier once the Attack Dogs are taken care of.
Defeat the Capra Demon and use the Key to the Depths to access the Depths.
The Depths
18. Location of Large Ember, Dark Souls: Remastered
The main purpose of going to the Depths is to collect the Large Ember. Some bodies of water in the area can restrict your movement. Equip the Rusted Iron Ring to help you explore the area unencumbered. The Large Ember is found inside a chest, guarded by a Butcher and an Attack Dog. Deal with the nearby Hollows first, then the Attack Dog, and finally fight the Butcher.
19. The Depths: rescue Laurentius, Dark Souls: Remastered
20. The Depths: Large Titanite Shard & Spider Shield, Dark Souls: Remastered
Rescue Laurentius, a pyromancer who sells various pyromancy spells that are useful for an SL1 character. Exhaust his dialogue. The next time you meet him would be at Firelink Shrine. A Large Titanite Shard can be found in the Depths as well as the Spider Shield, which has better stability than the Heater Shield. The other useful aspect of the Spider Shield is its ability to block 100% of poison attacks from Infested Barbarians and 100% toxic attacks from Blowdart Snipers. The shield is generally useful to help you explore Blighttown. The Heavy Crossbow, also found in the Depths, can be wielded by an SL1 character, but must be two-handed unlike the Light Crossbow. Other useful items include:
- Soul of a Nameless Soldier x 5
- Large Soul of a Nameless Soldier x 2
- Sewer Chamber Key. Use this key to open the door that leads to the bonfire at the Depths. The key is not required if you have the Master Key.
- Humanity
- Ring of the Evil Eye
Make your way to Andre at Undead Parish, give him the Large Ember, and use his services to ascend the Reinforced Club+5 to +6. You should have bought the Weapon Smith Box by now. The bonfire item allows you to upgrade your weapons. However, you still require the services of Andre to ascend your weapons.
Gaping Dragon (optional)
21. SL1 Gaping Dragon, Dark Souls: Remastered
You should have gotten rid of the Channeler to preempt the enemy from sniping magic at you while you fight the boss. This boss is not any more difficult than during your normal playthrough. Two-hand the Reinforced Club+6. You do not need to buff the weapon with Gold Pine Resin. Save it for more difficult bosses later in the game. Enter the fog wall and start the fight by sprinting to the boss, which should start off by slamming its snout onto the ground. Aim your R2 at the snout and move away to the side because the boss would perform a walking charging attack. Move along with the boss, wait for it to stop walking, and R2 its tail. Whenever the opportunity presents itself, try to R2 the tail to cut it off. The boss fight is a little easier with the tail cut off. Stay in front of the boss and close to it to bait the snout slam again so you can get in an R2 on the snout. Rinse and repeat as per above. Be wary of the hand swipe, the tail swipe, the jumping stomp, and the leg stomp. The boss also has a retch attack, where it vomits and the goo would expand along the ground to cover a wide area. Run as far away from the boss as possible to be outside the range of the vomit.
Defeat the boss and be rewarded with the Blighttown Key. You do not need this key because the Master Key can open a shortcut to Lower Blighttown.