Chaos Flame Ember
The Chaos Flame Ember allows you to upgrade a weapon along the Chaos path. Like a Fire weapon, a Chaos weapon deals fire damage. So why would you not stick to a Fire weapon? The reason is that the damage output of a Chaos weapon scales with the number of soft Humanities you have, whereas a Fire weapon does not scale with your soft Humanities nor your stats. You are SL1, remember? As a quick comparison, suppose you have a Fire Reinforced Club+10 (the maximum possible upgrade level for a Fire weapon) and a Chaos Reinforced Club+4 (the maximum possible upgrade level is +5). It does not matter whether you one- or two-hand your weapon.
- The Fire Reinforced Club+10 has 232 Physical damage and 232 Fire damage, a total of 465 AR.
- At 0 soft Humanities, the Chaos Reinforced Club+4 has 187 Physical damage and 213 Fire damage, a total of 400 AR.
- At 10 soft Humanities, the Chaos Reinforced Club+4 has 227 Physical damage and 257 Fire damage, a total of 484 AR.
A Chaos weapon deals more fire damage than a Fire weapon. Farming Humanity consumables is not difficult. Equip the Covetous Gold Serpent Ring you grabbed at Sen's Fortress and farm the rats at the Depths. For better drop rates, have a few soft Humanities, preferably 10. You have access to another Humanity farm at the Duke's Archives and in the area before the arena of Gravelord Nito. The best Humanity farm is the Chasm of the Abyss in the DLC.
Lower Blighttown
If you have not done so, return to Firelink Shrine and exhaust Siegmeyer's dialogue. Then go to lower Blighttown, where you should find him standing near a gang of Giant Leeches. Exhaust his dialogue there and gift him some Purple Moss Clumps to advance his quest line. The next time you meet him would be in Lost Izalith.
Demon Firesage
51. SL1 Demon Firesage, Dark Souls: Remastered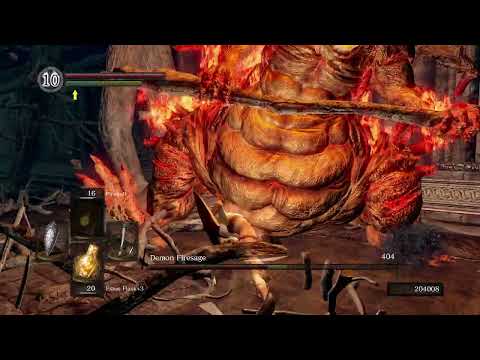
Similar to the Stray Demon, except for its magic attack and tendency to jump backward. Equip the Lightning Reinforced Club+4. Use R2 to quickly close the distance. The boss can bleed, but it usually requires a couple of hits. With quick enough attacks, you can bleed the boss at least 2 times during the fight. Stay close in front of the boss to restrict its move set. When the boss jumps backward, dash along with the boss and look out for an overhead attack or a magic attack. When the boss hovers upward, move away to avoid the subsequent butt slam and run in for a hit.
Defeat the Demon Firesage, dash down the flight of stairs, and light the bonfire. Be ready for the next boss fight.
Centipede Demon
52. SL1 Centipede Demon, Dark Souls: Remastered
Equip the Lightning Reinforced Club+4. Equip the Gold-Hemmed set and the Flame Stoneplate Ring to boost your fire defense. Enter the fog wall and head right until you see a shiny. You want to be on that area because it provides plenty of room for combat. Wait for the boss to approach you. At a distance, the boss tends to perform a thrust attack with one of its arms. Roll sideway away from the attack. Refrain from attacking the boss' arms. Cutting off an arm (or the boss' tail) and you would have to deal with a still moving appendage in addition to the boss itself. In general, you should hit the boss' head and/or its legs. Being up close to the boss and it would most likely jump up in the air in an attempt to hit you with a slam attack. Run as far away from the boss as possible and for extra precaution roll away. The boss has a quick upward jump where it would shoot a fireball at the ground. Use the same tactic by running or rolling away. Sometimes the boss would attempt to grab you with its smaller and shorter arm. Roll away from this attack and you should be safe from having the boss chewing your character.
Lost Izalith
Defeat the Centipede Demon and be rewarded with the Orange Charred Ring. Equip the ring to allow you to sprint through the various lava pools. You would still receive damage, but the HP damage is massively reduced as compared to when you do not have the ring equipped. Collect the Green Titanite Shard x 2, then dash to the next bonfire en route to Lost Izalith. You should see Solaire sitting despondently near the bonfire. Exhaust his dialogue to advance his quest line.
53. Lost Izalith: Red Titanite Chunk x 6 & Red Titanite Slab, Dark Souls: Remastered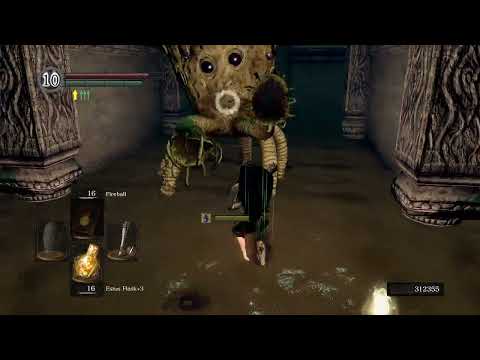
Wade through the lava swamp filled with Bounding Demons of Izalith, creatures that resemble the end half of a T-rex. Find a hidden bonfire and from there navigate to Lost Izalith proper, where you can advance Siegmeyer's quest line. Find him snoring above Chaos Eater x 4. Do not talk to him yet. Rather you should use a crossbow and bolts to dispatch of Chaos Eater x 3. As for the fourth Chaos Eater, shoot enough bolts at it to decrease its HP enough so that Siegmeyer would be able to one-shot the enemy. Now equip the Rusted Iron Ring, exhaust Siegmeyer's dialogue, and he would then drop down into the swamp and charge at the remaining lone Chaos Eater. Attack the enemy if you want, but be careful not to hit Siegmeyer as well. A fifth Chaos Eater can be found hiding in a corner, trying to ambush you. Quickly defeat this enemy before it has a chance to kill Siegmeyer. Get rid of all Chaos Eaters in the poison swamp and exhaust Siegmeyer's dialogue. The Chaos Eaters drop Red Titanite Chunk (base 10% drop rate), Red Titanite Slab (base 0.3%), and White Titanite Chunk (base 0.2%). The Chaos Eater x 5 in the swamp do not respawn. If you are lucky they would drop a few Red Titanite Chunks to help upgrade your Chaos weapon to +4. Run to the corridor where you collected the Sunlight Maggot and you should see Solaire sitting, again despondently. Exhaust his dialogue to advance his quest line. Useful items to collect along the way:
- Large Soul of a Brave Warrior
- Soul of a Hero
- Soul of a Brave Warrior x 2
- Rare Ring of Sacrifice. This item is useful during your first encounter with Seath the Scaleless.
- Red Titanite Chunk x 2. One is found in the swamp near the Chaos Eater x 5. The second is found near the root you used to descend into the swamp, and near a Chaos Eater.
- Green Titanite Shard x 2. Near the Chaos Eater x 5 in the poison swamp.
- Red Titanite Slab. In a wooden chest in the swamp.
Bed of Chaos
54. SL1 Bed of Chaos, "best" boss in the game, Dark Souls: Remastered
A mandatory gimmick fight where you must destroy two tree roots on either side of the arena in order to unlock the real boss. The whole fight itself is tedious, but at least you can quit and save your progress after destroying each tree root. Bring along the Longbow and plenty of arrows. Enter the fog wall, slide down the inclined plane, and dash to your right to destroy the root at the right end of the arena. Find a corner close to the root and shoot arrows at the root. You need to first break various branches protecting the root, then shoot arrows at the root. When you see a cutscene plays, skip the cutscene and quit to the main menu and load your game again. You would be placed in front of the fog wall again, but your progress with the fight is also saved. Enter the fog wall the second time, slide down, and dash to your left. Find a corner to snipe the root at the left end of the arena. When you see another cutscene plays, quit and reload as per above. Enter the fog wall the third time. Your target this time is the boss straight ahead. Gingerly push forward and drop down onto a root, being careful not to be pushed over the edge by the giant arms. Walk or run upward along the root, rolling to break the various branches that block your way. Eventually you should see a bug; that is the true boss of the fight. Use a Reinforced Club to hit the boss and the fight should be over.
A quick cheese method consists of using the Tokhi bombs strategy. Refer to the video below for an explanation.
How To CHEESE Bed Of Chaos [Firebomb Strat] | Dark Souls Guides![How To CHEESE Bed Of Chaos [Firebomb Strat] | Dark Souls Guides](http://img.youtube.com/vi/4BbTiCTe5KM/0.jpg)
After both roots are destroyed, the only thing left to do is roll through the various branches ahead and find the Chaos Bug. The tunnel to the Chaos Bug is dangerous. As your character rolls through the tunnel, the boss can perform the Volcanic Chaos attack where pillars of flames erupt. The tunnel does not afford much room to manoeuvre and your character would most likely be killed by the flame. You must then journey to the fog wall again and fight the second phase of the boss, aka the most annoying phase.
55. Demon Ruins: Chaos Flame Ember & other treasures, Dark Souls: Remastered
Defeat the Bed of Chaos. Navigate to the area that was previously completely flooded with lava before you defeated Ceaseless Discharge. Equip the Orange Charred Ring and find a shiny in a lava pool. That is the Chaos Flame Ember.